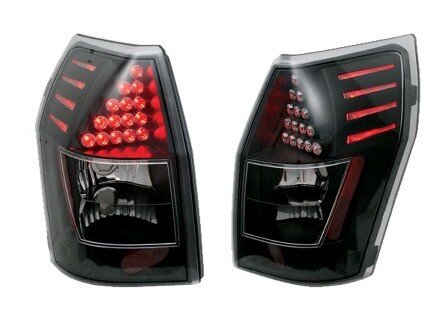
The taillights are a part of the lighting system of a vehicle that is attached to the rear part of a vehicle. They come in pairs – both left and right, having different types and various functions.
Their primary role of the taillights is for the safety of the drivers on the road. The red lights on the back are indicators of driving functions. They serve to prevent confusion among drivers on the road and alert other motorists of your intents. These lights signal braking, turning, and the shape and position of the vehicle. You can also illuminate the hazard lights in case of an emergency situation.
Unfortunately, many drivers fail to check both the front lights and taillights of a vehicle until they fail or and an accident occurs. That said, pay particular attention to your car’s tail lights as well. Below are three practical tips on how to check and fix your vehicle’s taillights. Keep on reading to find out more.
1. Testing your taillights
Testing the tail lights of your car is imperative before you begin your journey. To do this, you need a helper to see whether or not the lights are working. The best time to do this is at night when it’s much easier to see.
Make sure the tail lights brighten and remain on for two occasions: (1) when you step on the brakes, and (2) when the headlights are illuminated. Furthermore, you have to perform a visual check of the tails lights themselves to see any cracks, dry rotted seals, and leaks. Be wary of oxidation as it’s challenging to correct and requires replacements. All these steps are crucial in maintaining the long-term value of your car and of your safety on the road.
2. Replacing taillight bulbs
It should go without saying that you should replace your tail light bulbs if they are no longer working. Know that removing the bulbs is relatively simple and easy. All you have to do is to unclip the electrical pigtail wiring and carefully remove it from the bulb. The bulb automatically twists, and you can simply remove it from the metal contact housing.
Take note, however, that you should not touch the new bulbs with your bare hands. This is because the natural oils on your skin can create hotspots when the bulb is on, which can significantly reduce the lifespan of the tail light bulbs of your vehicle.
3. Replacing taillight assemblies
The tail light assembly is the group of lights mounted on the rear-end of your vehicle. The fittings for the tail light assemblies are usually concealed behind the trunk interior material liner. You will have to lift the trunk interior material liner, expose a couple of nuts, and remove them so that you can have access to the assembly. When all the retaining nuts are removed, the old assembly should pop right out. Then, you can have the new assembly positioned into place.
Ultimately, it is perilous to overlook the maintenance of your vehicle’s taillights. Follow the practical tips outlined above on how to test your tail lights, and replace the light bulbs and the assemblies. If you are looking for aftermarket auto body parts in Los Angeles, get in touch with us today to see how we can help.